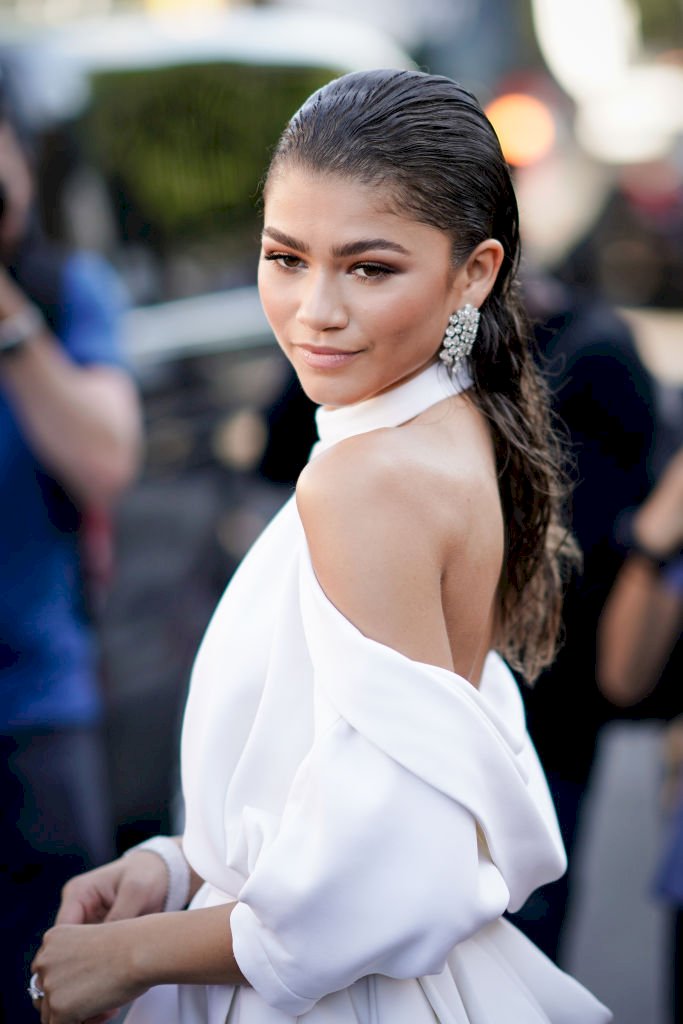
A Guide To Achieving The Wet Hair Look
Though it might appear that way, this trendy hairstyle doesn't require that you step out and about in dripping wet hair.
From Kim Kardashian to Jennifer Lopez, celebrities have successfully nailed the wet hair look, and it's become something of a trend now.
Thankfully for those keen to try new looks at home, it's a fairly simple and quick look to pull off. Here's how you can nail the wet hair look:
What You Need

Getty Images
To nail the wet hair look, you'll need a few products and tools that will help your hair appear saturated, shiny, and flexible.
- A Wide-Tooth Comb
- Hair Gel [Try: Oribe Gel Sérum ($63), L'Oréal Paris Advanced Hairstyle LOCK IT Extreme Style Gel ($5)]
- Hair Cream [ Try: Andalou Naturals' Argan Oil & Shea Moisture Rich Styling Cream ($8), Amika Supernova Moisture and Shine Cream($25)]
- Glossing Spray [Try: AVEDA's Brilliant™ Spray-On Shine ($30), Arrojo NYC Healing Oil Restorative Glossing Spray ($26), Elnett Precious Oil Satin Hairspray($15)]
- A Medium-Hold Hairspray (Try: IGK HAIR's 1-800-HOLD-ME No-Crunch Flexible Hold Hairspray)
Step 1
To achieve the wet hair look, you don't want to start with dripping wet hair. You want to start with more of a damp look.
So, after washing your hair, pat off excess water with a towel (or T-shirt for curly hair) until your hair is about 50 percent dry. Follow by combing your hair with a wide-tooth comb.
Step 2
Hair gel gives you the hold, while hair cream gives you the body. Using just gel might result in a crunchy final product, and on the other hand, cream alone can make the hair look greasy.
To pull off this look, you want to get the best of both. So combine the two products to make a gel-cream mixture and smooth that onto your hair. It's advised for thinner and straight hair; you may want to avoid focusing too much product on the roots to avoid losing volume. Also, go easy on the cream.
For curly, coily hair, evenly distribute the product throughout your hair to keep the hair flexible and minimize the chance of crunchiness.
Step 3

Getty Images
Use your comb to rake through your hair and define your natural texture if you have wavey or curly hair. You can also create your baby hairs at this point.
When you're happy with the overall look of your hair, go in with your glossing spray to add more shine and pull off the drenched look.
Step 4
The wet hair look is achieved by you layering the hair gel, cream, and hairspray onto your damp hair in quick succession.
You can go for a slicked-back look or a tousled, carefree style, depending on how you like your hair done. When you're satisfied, mist your head lightly with hairspray. Ensure that you do this step before the previous products dry completely.